It’s fun to catch a fish on a rod you built, no matter what size!
Build Your Own Custom Crappie Rod
It’s easier than you think!
by John L. Torchick
Much ink has been spilled on the craft of building a fishing rod. This will be a condensed version about the craft with some basic instructions, items needed and some resources to get started.
But let’s dispel one myth. In general, you should not build your own rod to save money. If you get into a high-volume operation, MAYBE you will come out a little cheaper. But odds are your best money saving option is to run down to the nearest big box store and pick out what

you want.
You should build your own fishing rod for the satisfaction of having crafted a tool with your own two hands. Just like making your own fishing lures, there is an immense amount of satisfaction that comes when you catch a fish on a DIY rod.
I started building custom rods about ten years ago. It was more of a hobby than a business. I started with basic rods that were plain vanilla compared to the rods found in the gallery at www.rodbuildingforum.com. The forum is also a great place to learn and ask questions as the members are most helpful.
Common components are the blank, grip, reel seat, guides, winding thread, epoxy for coating the thread and epoxy to glue the grip to the blank. A rod building kit is a good way to get started.
Blanks are available in more materials, actions, lengths and costs than you can count. What are you planning to catch? What action do you need for lures or baits you will be using? What length do you need? The websites listed at the end can help to get you started.

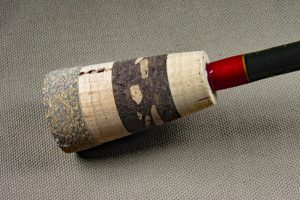
I made my own grips by gluing cork rings together and turning them on the lathe. Suppliers offer a wide range of attractive pre-made grips ready to install on the blank. The grips will have a small hole through the center that will need to be reamed to fit the blank. The blank is tapered slightly at the butt section so the hole will need to be tapered with a rattail file. File a bit and dry fit. A good two-part epoxy will be needed to glue the grip to the blank. Rough the grip area with 120 grit sandpaper to allow good adhesion to the blank. When handling the blank, wipe with a coffee filter (it’s non-linting) and some denatured alcohol. CAUTION- Use a thirty-minute epoxy. My first rod kit had five-minute epoxy. I barely got the grip in place as the epoxy started to set!
Guides are another component that is dependent on what rod you are building and your budget. The guide foot might need tapering with a fine file or stone to allow the thread to flow smoothly up the guide foot. Otherwise, you will get a gap where the thread leaves the blank and climbs up the foot. Make sure you clean the foot and check for any burrs that might cut the thread or damage the blank. A kit will have the guides spacing or the supplier will have charts for spacing.
“A rod building kit is a good way to get started.” ~ John L. Torchick
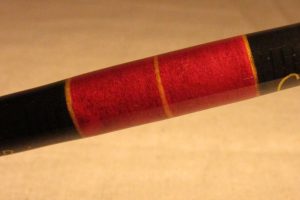
Wrapping the guide can be done with a simple setup- cut a V in the sides of a small cardboard box and a hole in the back for the thread. Put the thread in a coffee cup and run it through a book to put tension on it. Run the thread through the hole. Place the blank in the notches, ready for wrapping. If you plan on making more rods, something more permanent will be needed.

The guide is held into place with a thin strip of masking tape or a small rubber band. The wrap is started at the distance of five or six wraps. Hold the end at an angle and the thread is then wrapped over itself. Five or six wraps will hold the thread. Pull the end a bit to tighten. The tag end is carefully cut with a single edge razor blade. Don’t saw the thread with the razor blade as this can damage the blank. Hold the razor blade on the thread and move the thread back and forth. Wrap within five or six wraps of the end of the guide foot. Make a loop of about five inches from a piece of wrapping thread. Wrap over the thread loop, wrapping to the end of the guide foot. Put the end of the thread in the loop and pull the loop back through the wraps. Pull to tighten the wrap. Carefully cut as described for the beginning of the wraps.
Applying the epoxy to the threads is not difficult but requires patience. Plain epoxy off the shelf at the hardware store or big box store will not work. Wrapping epoxy has some flex to it and won’t yellow over time.
If you want to keep the bold colors of the thread, a coat of color preserver is needed. Without color preserver, the thread becomes translucent.

I applied epoxy with an inexpensive artist’s paint brush. Clean the brush with denatured alcohol before using. Instructions for mixing will be included with the epoxy. Mix thoroughly! The mixture will be cloudy but will turn clear as it is mixed. I first applied a thin coat on the thread only. The epoxy sets for several hours then a coat was applied that covered from the blank to the guide, making sure the “tunnel” under the guide foot was filled. This prevents water from destroying the time spent to build the rod.
The epoxy will require several hours to set. Keep the cup and the brush- this tells you the progress of setting up.
Now you can do two things- You can sit and turn the rod 180 degrees each time the epoxy starts to run…until it quits running. Another way is to make a turning motor. Suppliers will have turning units. One can be made from a microwave motor, two small nuts, screws, an aerosol cap on the shaft, rubber bands and an old extension cord.
Some suppliers include http://www.mudhole.com http://www.batsonenterprises.com http://www.anglersworkshop.com. Many suppliers of rod building components sell books and videos. Several have their own instructional videos on their website.
Last and not least, there is nothing more satisfying than catching a fish on a rod that you built!


